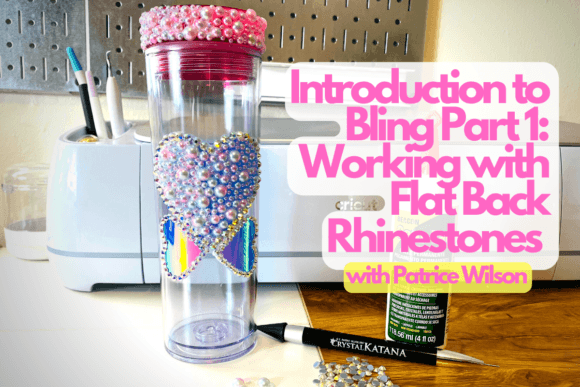
Introduction to Bling Part 1
Rhinestones make everything brighter — not just visually, but in intention, energy, and impact. Introduction to Bling Part 1: Working with Flat Back Rhinestones is your grounded, hands-on entry point into intentional embellishment. It’s not about excess. It’s about precision, purpose, and the quiet confidence that comes from knowing exactly how to place a stone so it catches light — and attention — at the right moment.
What This Class Really Offers
This isn’t a generic “add sparkle” tutorial. Led by Patrice — a craft educator with over 15 years of experience teaching surface decoration across studios, maker fairs, and small business workshops — Introduction to Bling Part 1 focuses on flat back rhinestones: their physical properties, optical behavior, and real-world application logic. You’ll learn why certain stones work better on curved acrylic than on textured wood, why adhesive choice changes durability more than appearance, and how spacing affects perceived value (yes — even in DIY).
You’ll start with one focused project: blinging an acrylic tumbler using flat back rhinestones alongside a vinyl decal. That pairing isn’t arbitrary. It teaches layering — how rhinestones interact with printed graphics, how alignment impacts readability, and how to balance shine without obscuring message or function. The result is functional art you can hold, use, and share — not just display.
Creative Possibilities — Beyond the Tumbler
Once you understand the fundamentals — stone size vs. surface curvature, adhesive cure time vs. workspace humidity, light refraction across different backing colors — the applications multiply meaningfully:
- Branded merchandise: Small-batch tumblers, phone cases, or notebook covers for creators launching a product line. A single well-placed rhinestone accent along a logo edge signals premium detail without raising production cost.
- Educational tools: Teachers embedding tactile elements into learning aids — think rhinestone-numbered flashcards or sensory spelling tiles where texture supports memory retention.
- Marketing assets: Bloggers and small business owners creating Instagram-ready props — a rhinestone-embellished planner page, a custom water bottle used in reels, or branded gift tags that stand out in unboxing videos.
- Personalized gifts: Not just names, but meaningful symbols — constellations, initials in script, tiny hearts — placed with intention on items people use daily.
Adapting the Skills Across Contexts
The strength of Introduction to Bling Part 1 lies in its transferable framework. Freelance designers use the same spacing logic when placing icons in digital mockups. Educators apply the layering principle when designing multi-sensory lesson materials. Entrepreneurs translate adhesive testing protocols into small-batch quality control checklists.
For example, a content creator filming lifestyle tutorials might adapt the tumbler project into a reusable “bling station” setup — pre-cut adhesive templates, labeled stone trays, and lighting notes — making repeatable, consistent shots faster. A small-batch jeweler could extend the principles to resin bezels, using flat backs as structural anchors before pouring. Even graphic designers find value in studying how rhinestone placement shifts visual weight — a skill directly applicable to layout hierarchy and focal-point design.
Practical Tips That Stick
Patrice emphasizes three practical anchors throughout the class:
- Start with surface prep — not stones. Acrylic, glass, metal, and coated wood all require different cleaning and priming steps. Skip this, and adhesion fails before the first stone sets.
- Use tweezers designed for flat backs — not general craft tools. The angled tip and micro-grip prevent slippage and allow rotation for precise orientation (critical when working with marquise or navette shapes).
- Test adhesives in your actual environment. Humidity in a Florida studio differs from a Colorado workshop. UV-cure glue behaves differently under LED desk lamps versus natural north light. Run small tests — on scrap material, under your usual lighting — before committing to a full piece.
Keeping Results Clear, Consistent, and Audience-Friendly
Bling only works when it serves the viewer — not just the maker. In Introduction to Bling Part 1, Patrice walks through simple filters to keep projects audience-aligned:
- Function-first editing: If it’s a tumbler, will rhinestones interfere with grip or lid closure? If it’s a notebook cover, do stones catch on backpack zippers?
- Light-aware placement: Avoid clustering stones where shadows fall consistently (e.g., the inner curve of a handle). Instead, position them where ambient or task lighting naturally hits — near the top rim, along the front plane.
- Scale-matching: A 4mm stone reads as bold on a 20oz tumbler but overwhelming on a 4oz sample cup. Match stone diameter to object footprint — a quick ratio check saves rework.
Why Flat Backs First — And What Comes Next
Flat back rhinestones are the most accessible entry point because they’re stable, predictable, and forgiving. They don’t require heat guns or timing pressure like hot fix stones — which means fewer variables to troubleshoot while building foundational muscle memory. That stability also makes them ideal for mixed-media work: combining with vinyl, paint, resin, or embroidery.
That’s why Introduction to Bling Part 1 intentionally stops where heat begins — setting up Bling Part 2, which dives into hot fix application, iron temperature calibration, and fabric-safe techniques. Think sequined tote bags, embroidered patches with metallic accents, or heat-transfer rhinestone logos for team apparel. But first, master the flat back. Because clarity precedes complexity — and confidence grows from controlled repetition, not rushed variety.
Your First Step Starts With One Stone
You don’t need a studio. Just a clean surface, a pair of fine-tipped tweezers, a small dot of jewelry-grade adhesive, and five minutes of focused attention. Place one stone. Step back. See how it catches the light — not as decoration, but as decision. That’s where Introduction to Bling Part 1: Working with Flat Back Rhinestones begins: with intention, grounded in practice, and built to scale with your goals.